3D Printed Cookie Cutter Programs
- Chelsea Rose

- Jan 20, 2022
- 5 min read
Updated: Jan 20, 2022
Learn some basics on how to design and model 3D printed cookie cutter (or clay cutter) shapes with specific insight to designing with with programs that are free or paid! Here is a list of what I use (and a bit about how), and other popular designing programs.
One of the first things I did even before getting a 3D printer was start to learn how to design and model cookie cutter shapes! These are the programs I use the most now for designing cookie cutters. Hope it helps you, or you can work with me to get your ready-to-print file.
My background is in art education, graphic design, and baking. Because of that I have Adobe Creative Cloud and regularly use Photoshop and/or inDesign in my 3D modeling process. I will list other programs that are popular or free to use as well, but a couple I haven’t tried yet. It is definitely possible to design cookie cutters without paying for programs.
Step 1: Design image & make .svg
Here is what I use when I’m starting to design from my phone (iPhone X):
Procreate Pocket app ($ and only available on iPhones)
Cricut’s Design Space app (turn off the grid background, screenshot your design and then crop before converting to an .svg)
You can also draw it out on paper and take a picture - as long as its a pretty blank background and dark enough lines you will be able to create an .svg from it.
This is what I use if I design from my computer (HP):
Adobe Photoshop
Adobe InDesign
By the way, people who have an iPad seem to really love Procreate.

Plus I love the timelapse that Procreate Pocket creates for each piece that you can export! This design came about because my son said T-Rex doesn't like hearts... T-REX likes MEAT! (I didn't have the *heart* to explain what hearts actually are quite yet, he only just turned 4).
They help me make the initial design and get an .svg made so it can be imported into a 3D software (I typically use tinkercad but a popular one that is free for hobby use is fusion360). Another way to get your design into an .svg file is to upload to a converting website like: picsvg.com which accepts .jpeg, .gif and .png files.

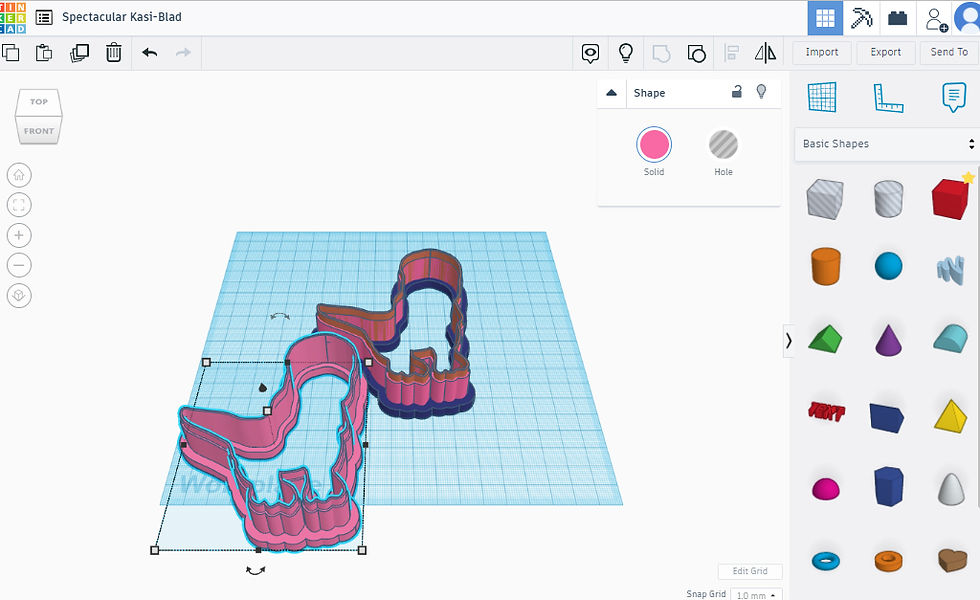
For cutters, I find it easiest to make the different edge, wall, handle shapes with their correct diameters in Adobe Illustrator, which is what's showcased above. Another way is to take the "hole" and grow that shape in the 3D program more like how this person does it on youtube.
Step 2: Turn .svg into 3D .stl file
Program I use for 3D modeling my svg:
Tinkercad.com (as seen below)
Other people report that these programs and sites work well:
blender (I have this downloaded and it’s capabilities are more advanced/technical than tinkercad, a bit of a bigger learning curve). autoesk's Fusion 360 (the “grown up” version of tinkercad; there is a free version for personal use/hobby users, and a free version with accepted application for "startups" that's worth checking out otherwise it's a tiered subscription).
Step 3: Slice the .stl into a .gcode for the printer
Once you have an .stl file you need to open it in a slicer program. That translates the 3D design into code for your printer to read one line/layer at a time. With a filament printer like Ender’s Creality CR-6 SE (what I have) that means its code will tell it where to start and stop every drawn out line of every layer until your project is fully printed. I have been using Creality Slicer that is partnered with Cura.
Other slicer programs for FDM printers:

In the slicer program you can set the wall thicknesses, infill percentage, and supports to print (among other things).
Most cookie cutters do not need a support, but I use a skirt (under the category of bed adhesion) to help make sure my filament is coming out smoothly and my z steps are dialed in and I’m getting the right amount of squish for the filament to the bed.
Step 4: Print

Here I realized I prefer the tail on the side that I drew it, so I needed to mirror the cutter when printing I was able to do this in the slicer, but I will do in in the 3D modeling program and save in case I want to print this again in the future and I don't have this saved .gcode anymore.
Step 5: Test & Eat (or in this case, revise the design and start back at 1!)
One consideration while designing is to avoid squished areas outside of the cutter space that will get jammed with dough (or clay). I worried that between the legs would be too tight and ultimately I don't like it this way, makes for tricky release from the rolled out dough - and more work in clean up (of the cookie and the cutter!)

I will be joining the legs in the cutter and just using the icing to differentiate between the two legs. Look forward to updates to this blog when the legs are combined.
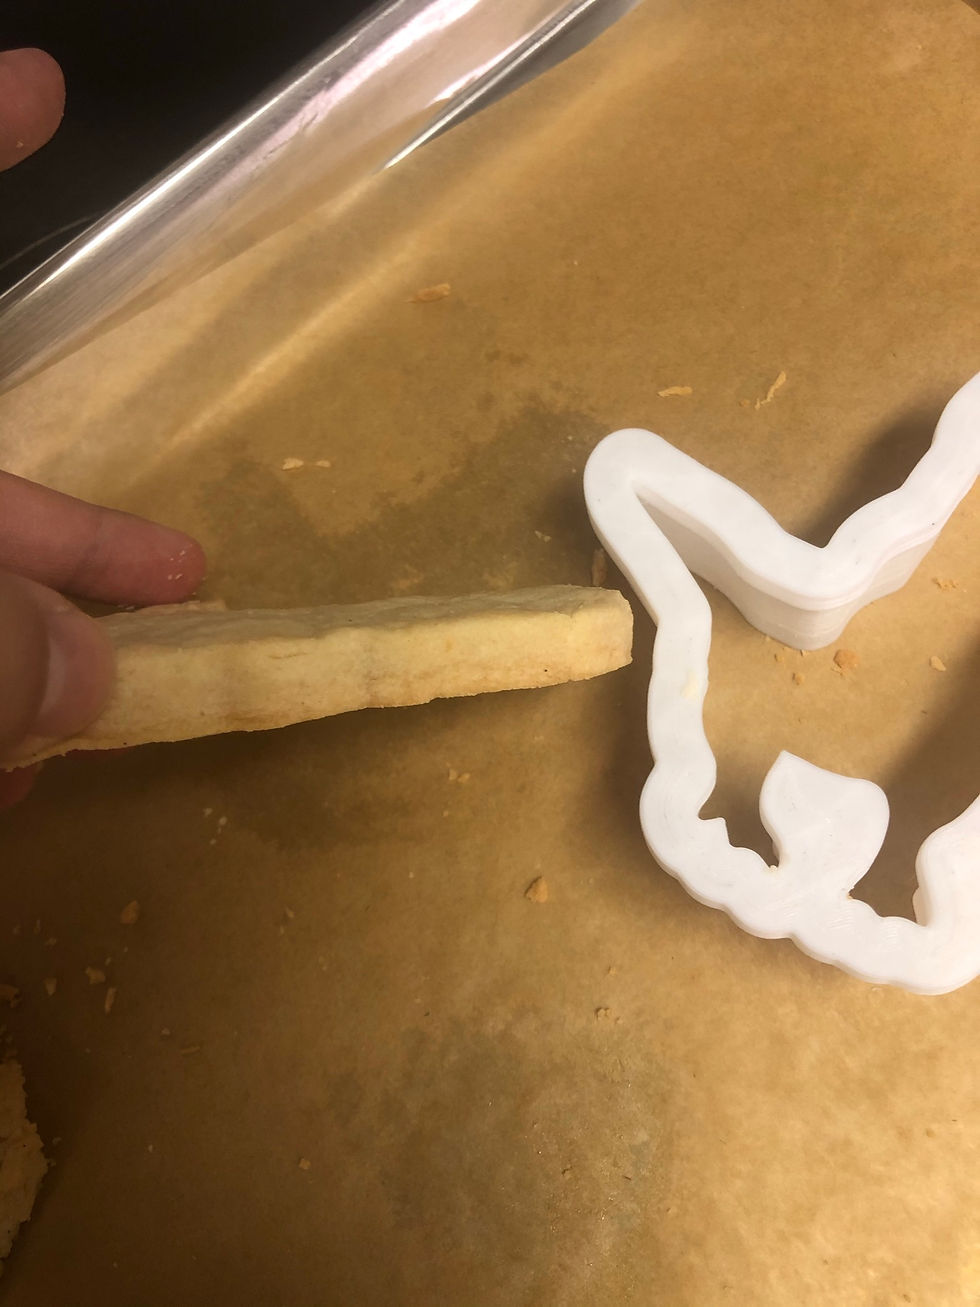
I do love how sharp the edges were on the cookies tho! Everywhere except between the legs, mainly because the cut through dough got smooshed in between.
Once this design is perfected the .stl file will be for sale in my shop for instant download! I also have some files and baking tools available for free download if you’re a member of this site (it’s free to be)! If you have an idea for a cutter of your own, I am currently welcoming commissioned designs, please email me at chelsea @ rosemacarons . com with your ideas!
Troubleshoot:
Looking for a troubleshooting guide? Here is a good one that I’ve recently found to reference that helps me make adjustments to my prints. She is a fellow military spouse, how cool!
There are quite a few groups on Facebook to help out 3D printing folk, I particularly like 3D Cookie Cutters and 3D Printing for Women and Girls. 3D Printed Kids Toys is also a lot of fun for inspiration. Hope this helps you on your journey to choosing which 3D Printed Cookie Cutter Programs you’ll use! Thanks for reading.

FYI Depending on what filament you use, a cookie cutter could be more “disposable” - there are different opinions on if you should seal your cutter because the nature of 3D printing creates tiny cracks for microorganisms to get in. Some filament will warp when in contact with hot water (like PLA) and others won‘t (like the more finicky PETG). Be aware that not all filaments are created with colors or additives that are food safe and the process of heating up the filament to print could void some of the food safe certifications. Using a sanitizing solution or disposing cutters after each batch may be safest. But if they are being used for personal use “you do you” ;) Do your research to decide how you want to print and proceed with making custom cutters.
P.S. Another great way to use this list of 3D Printed Cookie Cutter Programs is to make cutters for clay - like these types of popular light-weight earrings. So pretty, right?!
Which programs do you use or plan to use for your 3D Printed Cookie Cutter needs? What shape would you make first? I'd love to know! What would you like me to go more indepth on in this process?


Comments